The orchard management menu lets you manage piece rates, manage staff, pruning/thinning, and print badges.
Orchard Management Menu
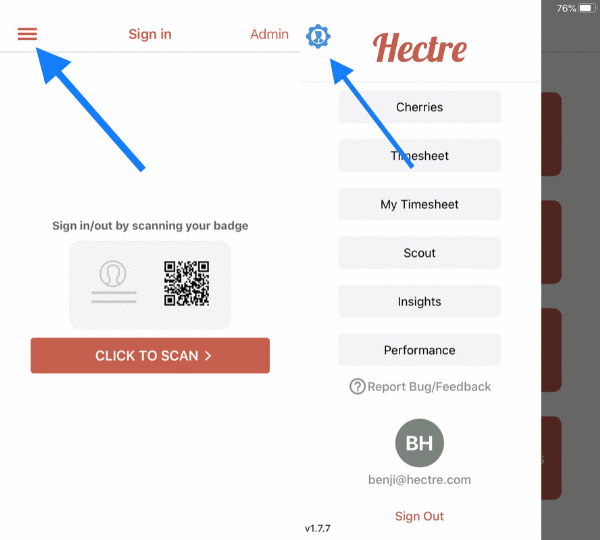
Access the orchard management menu
Step 1: Click on the ‘hamburger icon’ at the top left corner of your screen.
Step 2: Click on the ‘gear icon’ at the top left corner to access the menu.


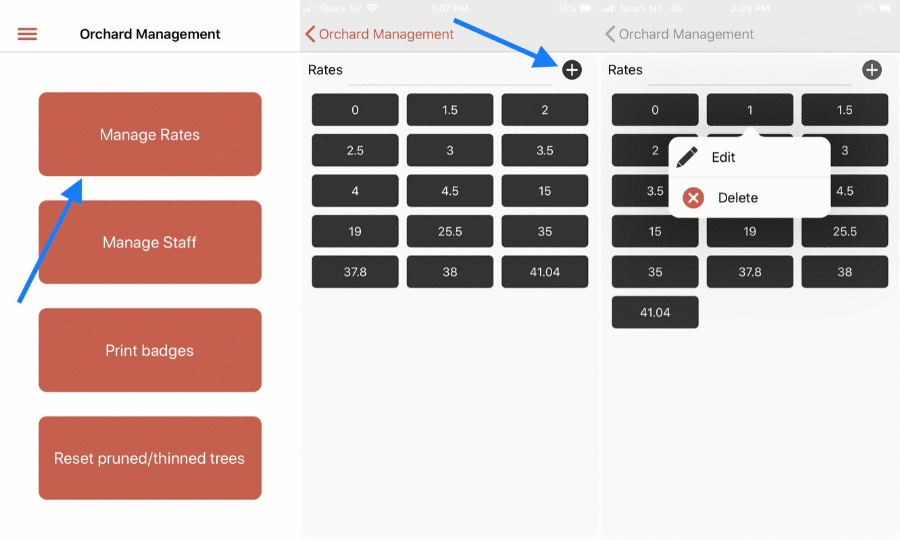
Manage rates
Step 1: Once you’re on the menu, select ‘Manage Rates’.
Step 2: Click on the ‘+’ button on the top right corner to add a rate.
Step 3: You can edit a rate by holding down on the particular rate and selecting ‘Edit’.
Manage staff
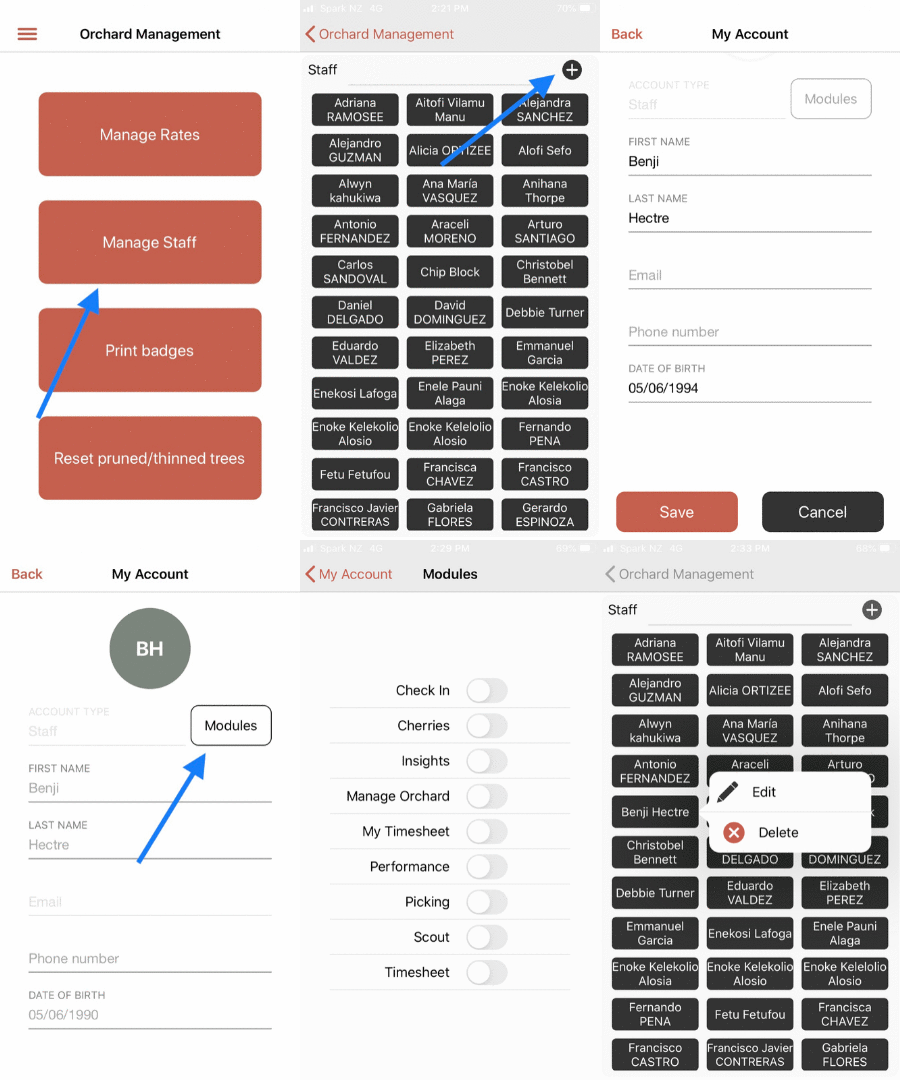
Step 1: From the orchard management menu, select ‘Manage Staff’
Step 2: Add a new staff member by clicking on the ‘+’ icon at the top right corner. Fill in the person’s details and click on ‘SAVE’.
Step 3: You can now add modules to this person by clicking on the name and then navigating to ‘Modules’.
Step 4: Toggle on the required module(s) for this person.
To delete or edit a staff member, hold down on the name and select ‘Delete’ or ‘Edit’ respectively.


Print badges
Print badges for the staff you just added.
Step 1: First, make sure your printer is connected to your device.
Step 2: Once your printer is connected, select the staff who’s badge you want printed.
Reset pruned/thinned trees
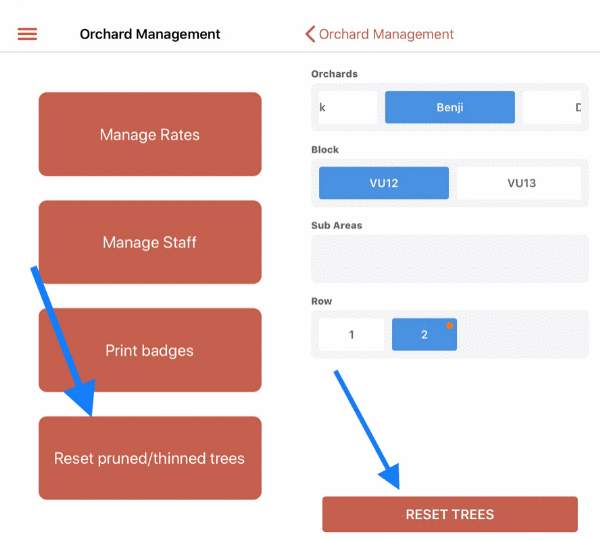
This is for you to reset the number of pruned/thinned trees for a particular row of a block.
Step 1: Head over to ‘Reset pruned/thinned trees’ under the Orchard Management menu.
Step 2: Select the Orchard, Block, Area, and Row you want to reset.
Step 3: Click on ‘RESET TREES’
Step 4: Select either ‘Clear pruned trees’ or ‘Clear thinned trees’ depending on what you want to reset.
You have now reset the number of pruned/thinned trees for the selected row and block.

Want to know more?
Contact us to find out how we can help transform your orchard.


